GPL Blog

Cooking the Books | The Kitchen Front by Jennifer Ryan

Welcome to Cooking the Books (where we try recipes found in, well, books!) This month, Children’s Assistant & STEM Specialist Ms. Meghan tried out a recipe from one of her recent reads:

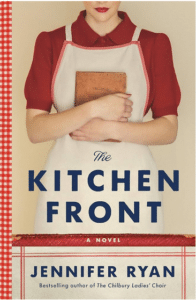
Just in time to finish up Women’s History Month, here’s a historical fiction novel that follows four British women as they cope with food rationing, grief, and societal pressures during World War II.

I’ve had an ARC (Advance Reader’s Copy) of The Kitchen Front on my Kindle for years now, and just never got around to it. Cooking the Books has once again knocked another book off my TBR (To Be Read) mountain. I just wished I enjoyed it more.

I’m in the minority here. TKF has a 3.97 star rating on Goodreads and a 4.4 star rating on Amazon. The novel details the lives of four British women from varying backgrounds as they compete for a spot on a radio program during World War II. Rationing was in effect at this time, and the book opens with the weekly allotment for one adult. A stick of margarine, half a stick of butter, three pints of milk, one cup of sugar…very different from the way we eat today. The radio program, based on an actual one, helped women stretch out their rations with creative (sometimes very creative) recipes. I enjoyed this look at an aspect of the war that I hadn’t seen written about before, especially in the crowded field of WWII novels. Unfortunately, that was about all I liked.

Overall, I found the book to be flat, predictable, and breezy. I am all for breezy books that give your mind a break, but that’s not how this one is advertised. The characters do a lot of speaking out loud; the author definitely does a lot more telling as opposed to showing. Perhaps because I didn’t enjoy it, I also found myself nitpicking. A character says he wasn’t aware that another was in the contest, then on the next page asks why the efforts to sabotage her had failed. A barn owl hoots instead of screams. Little things that should have been caught by the editor. Without giving away spoilers, a major life-changing decision is flip-flopped in the span of three pages. This just wasn’t the book for me, but as I said, it is the book for a lot of people.

There are a number of starter, main course, and dessert recipes featured in the book from historic sources, all of which adhere to the Ministry of Food rationing to various degrees. Unsurprisingly, there was an active black market for ingredients, and those who could afford them didn’t go without. Many of the recipes offer a lot of flexibility, which is to be expected when working with limited ingredients. For various reasons, I declined to attempt The Ministry of Food’s Sheep’s Head Roll or Chef James’s Whale Meat and Mushroom Pie. Instead, I made Audrey’s Fruit Scones. I vaguely remember making scones 20 years ago. This recipe contains a lot less sugar than modern recipes and produces a…perfectly adequate vehicle for getting butter and/or jam to your mouth. The apricot flavor was good, with comments that it ‘could use more apricot, less scone’ but other than that? Eh. A coworker said ‘mostly good, a little bland – but aren’t all scones?’. It does produce an incredibly wet, sticky dough; if you think you’ve got enough flour on your surface, think again.

Scones: 2.5/5 (based on all opinions)

Book: 1/5 (based on my opinion)


The Recipe


Audrey’s Fruit Scones

Makes 12 scones


Ingredients:

3 cups flour
½ teaspoon salt
5 teaspoons baking powder
1 tablespoon sugar
1 ½ cups dried fruit (raisin, sultanas, red currants, apricots, prunes, etc.)
¼ cup butter
¼ maragaine, lard, or suet (I used margarine)
1 egg, beaten, or the equivalent in dried egg powder
1 cup milk

Instructions:

Preheat oven to 425 F/220 C. Sieve the flour, salt, and baking powder into a bowl. Add the sugar and dried fruits and mix. Cut the butter and margarine into small pieces and rub it in. Mix the egg and milk and slowly add until the dough is a stiff consistency. Roll it out into a thick layer, about 1 inch thick, and use a floured cutter to cut it into circles. Place on a greased baking tray and bake for 10 minutes or until risen and golden brown.

Cooking the Books | Comfort Me With Apples by Ruth Reichl

Welcome to Cooking the Books (where we try recipes found in, well, books!)

Ruth Reichl’s memoir, Comfort Me With Apples: More Adventures from the Table, follows a burgeoning restaurant critic in the late 1970’s. Reichl, born in New York, starts her career as a chef in San Francisco with her artist husband. The memoir takes a frank look at relationships, occupational hazards, and of course, food. Reichl accounts meeting celebrities such as Wolfgang Puck and comedian Danny Kaye, details unusual experiences (like a 6 hour meal made entirely with garlic) and madcap adventures in the front (and back) rooms of restaurants far and wide. As would be expected in a memoir by a foodie, each chapter entails one or more extraordinary meals, and Reichl’s prose elicits the aromas, flavors and emotions (from sentimental to hilarious) of good food.

Recipes are sprinkled throughout the text – including sweet potato pie – that Reichl baked over and over again as therapy after being mugged near Berkley, California. It is this recipe that I brought to work for review by colleagues.

Sweet Potato Pie

From Comfort Me With Apples by Ruth Reichl

Ingredients

1 medium sweet potatoes (1.25 lbs)
¼ cup unsalted butter
¾ cup sugar
¾ cup whole milk
3 large eggs
1 tsp vanilla
½ tsp cinnamon
¼ tsp freshly grated nutmeg
¼ tsp salt
1 TB dark rum
1 TB flour
1 unbaked 9 inch pie shell

Instructions

Preheat oven to 350 degrees.

Prick the sweet potatoes with a fork and roast them in a shallow pan in the oven until tender, about 1.25 hours. Cool to room temperature. Raise the oven temperature to 400 degrees and place a cookie sheet on the bottom rack. Scoop the flesh from the potatoes into a bowl and discard the skins. Mash the potatoes until smooth. Melt the butter in a small saucepan and stir in the sugar. Add the melted butter mixture to the sweet potatoes with the milk and eggs and beat with a whisk until smooth. Whisk in the remaining ingredients (will be quite liquidy). Pour the filling into the pie shell. Carefully transfer the pie to the heated cookie sheet on the bottom rack of the oven and bake until filling is just set, about 40 minutes. Put on a pie rack to cool.


My colleagues’ reactions:  “This is utterly delightful. Sweet potato pie is one of my favorite desserts, and it reminds me of my grandma.” “OMG delicious.” “Reminiscent of pumpkin pie, but with a milder, more subtle flavor and wetter texture. 9/10”

Another colleague, originally suspicious of a sweet potato pie recipe from an east coast native, noted “I owe an apology to the New Yorker. The pie was quite delicious.”


My verdict: The pie came out a vibrant amber color, smooth on top and in texture, and I thought, absolutely delicious, if not a bit on the sweet side. I plan to substitute sweet potato for pumpkin pie for the foreseeable future, perhaps using less sugar depending on the flavor of the potatoes. The book was entertaining and educational – so I recommend both!

Pie: 5 stars. Book: 5 stars.

Cooking the Books — Tasty: A History of Yummy Experiments by Victoria Grace Elliot

Welcome to Cooking the Books, where we try recipes found in, well, books! This month, Children’s Assistant & STEM Specialist Ms. Meghan tried out a recipe from one of her recent favs: Back in September, I reviewed Yummy: A History of Desserts by Victoria Grace Elliott. Now, food sprites Peri, Fee, and Fada are back (along with their new friend water sprite Naia) for Tasty: A History of Yummy Experiments. This middle grade nonfiction graphic novel (once again suited for readers of all ages) traces the history of cheese, pizza, pickles, soda, easy food (like canned soup and processed cheese), and gelatin. The format for Tasty is the same as Yummy: the sprites introduce us to the story of a food through a combination of history lessons, scientific explanations (the mold in blue cheese is in the same family as penicillin!), interviews with historical figures, and recipes! There is a Read more »

Cooking the Books — No-Bake Cookies: More Than 150 Fun, Easy, & Delicious Recipes For Cookies, Bars, and Other Cool Treats Made Without Baking by Camilla V. Saulsbury

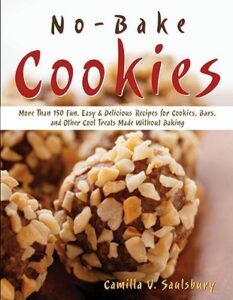
With it being the end of the year, many people are pressed for time–me included. With activities nearly everyday outside of work, Camilla Saulsbury’s No-Bake Cookies: More Than 150 Fun, Easy, & Delicious Recipes For Cookies, Bars, and Other Cool Treats Made Without Baking came in handy for my Cooking the Books article this month. As the title suggests, Saulsbury includes more than 150 recipes for creating quick and easy snacks without the need for baking. Saulsbury includes notes on how to prepare for each type of treat including drop cookies, shaped cookies, cereal bars, cookie bars, and icebox bars.

As the holidays approach, I chose her “Gingerbread Chews” recipe. Preparation was fairly simple and I was able to complete the treats in less than 30 minutes! Be careful not to cook the brown sugar and peanut butter too long, as they may start to evaporate. You’ll need as much of this sticky liquid mixture as possible to coat the crisp rice cereal. It may even be worth adding a little extra of these two ingredients. There was no indication as to whether you should use your hands to ball up the chews before placing them in your wax paper lined container, but I found that this step was necessary in keeping all of the ingredients together. I’ll admit that I may have left a little too much time between taking the pan off the heat and adding the other ingredients which could have contributed to the evaporation. I suggest doing this and forming the balls as quickly as possible so that they don’t dry out too much.

My coworkers’ reactions:

Pros:

  • “I love the light and airy texture. The spice is flavorful without being overpowering. Very tasty and seasonal.”
  • “I could eat these all day!”
  • “Delicious! I would like a copy of the recipe.”
  • “I love rice crispy treats. I love gingerbread. So… obviously, I love these! They are great as is, but I would also like more chewiness. I guess that means add marshmallows?”

Mixed Reviews:

  • “It’s not exciting to me, but I like it. I like the texture and it tastes like a candle.”
  • “Perhaps a tad too much spice, but still delicious!”
  • “As a gingerbread hater, these are the perfect balance of sweet and ginger-y.”
  • “The scent of peanut butter threw me a loop–and eventually the spices became more pronounced on the tongue–the spicy ginger hit. I don’t think I’ve ever had anything quite like this before! Not bad, but ‘unusual.’”

Cons:

  • “I enjoyed the flavor and chewiness. Nice texture, but I think I would prefer it without the spices. Perhaps a simple peanut butter or chocolate flavor would be better.”
  • “It’s not my thing. I like the texture. It’s nice and crunchy, but the ginger is reminiscent of a curry and I don’t know why you would want that in a sweet treat.”
  • “Huh. I’m not sure what to make of the peanut butter with the spices. The ginger is a bit too much for me, I’d reduce it by ¼ teaspoon.”

Overall, I am pleased with this recipe in that it didn’t take much time to prepare. It seems that for the most part, people either loved the gingerbread chews or they didn’t. Personally, I was a fan of the flavor and texture, but the taste of ginger didn’t make sense to me with this particular style of cookie. I will definitely try other recipes from this cookbook, but I don’t think I’ll revisit the gingerbread chews again.

Recipe

Ingredients:

½ cup packed dark brown sugar
½ cup dark corn syrup
¾ cup creamy peanut butter
1 teaspoon vanilla extract
1 ¼ teaspoons ground ginger
¾ teaspoon ground cinnamon
⅛ teaspoon ground cloves
4 cups crisp rice cereal

Directions:

  • Line cookie sheets with wax paper.
  • In medium-sized saucepan combine the brown sugar and corn syrup. Bring mixture to a boil, cooking and stirring constantly, until sugar is completely dissolved. Remove from heat. Stir in the peanut butter, vanilla, ginger, cinnamon, and cloves until blended and smooth.
  • Add the cereal to the peanut butter mixture, stirring until well coated. Working quickly, drop the mixture by heaping teaspoons onto the wax paper. Let stand in cool place to harden. Store tightly covered between layers of wax paper.
  • Makes about 24 cookies.

Cooking the Books | Blueberry Blunder by Amanda Flower

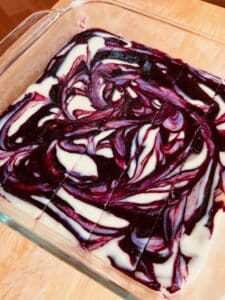
Welcome back to Cooking the Books (where we try recipes found in, well, books!)

Amanda Flower’s who-done-it, Blueberry Blunder (An Amish Candy Shop Mystery #8) was an exploration into a genre I don’t normally frequent. As more of a literary fiction gal myself, my exposure to cozy mysteries has thus far been to admire the punny titles on the library’s paperback spinner rack:  Another One Bites the Crust, Dim Sum of All Fears – you get the point. However, when I saw this recipe included in the back pages (Blueberry-and-Cream Fudge) I decided to take a leap for the sake of…research.

The plot:  Bailey is a candy shop owner in Amish country Ohio, building her dream:  a candy factory. When her contractor is murdered, she is the self-appointed sleuth out to clear her friend’s family name. There’s plenty of pleasant dialog, an adorable pet pig, and enough small-town festival charm to fuel a Hallmark movie. I did become more invested in the mystery as the novel progressed and found the Amish culture descriptions enlightening.

The recipe:  I cooked up the fudge, refrigerated it, and brought it to work the next day. While it was set, it was difficult to get out of the pan. Pro tip: when it says “line the pan with parchment” line the bottom and the sides in one large piece. That way, the fudge can be lifted out to be cut and served.

My colleagues’ reactions:

The flavor:  “More blueberry!” “I can’t believe I’m saying this – too sweet!”

The texture:  “Creamy, but hard to get out of the pan.” “Texture was perfect.”

Overall:  “Messy – probably needs to be refrigerated?”  “I would eat this again!”

In summary: I am more than happy to move on from the cozy mystery genre, and despite my love of all things sweet, this recipe is not one I will try again.

Book and recipe: 2/5 stars

Bailey’s Blueberry-and-Cream Fudge

from Blueberry Blunder by Amanda Flower

Ingredients:

1 cup fresh blueberries
½ T cornstarch
1 T lemon juice
¼ cup sugar
24 oz white chocolate chips
¼ stick of unsalted butter
14 oz sweetened condensed milk

Directions

Line a 9×9 pan with parchment.

Make the blueberry sauce. In a small pan, add blueberries, sugar, lemon juice and cornstarch over medium heat. Stir continuously and smash the blueberries until you have a thick sauce like a puree. Using a fine mesh strainer, push the puree through into a bowl.

Make the fudge cream. Over a double, add the white chocolate chips, sweetened condensed milk and butter. Stir continuously to blend and until all the chocolate is melted.

Pour ⅓ of the white chocolate mixture into the 9×9 pan. Pour ⅓ of the blueberry sauce on top of the chocolate in the pan. Using a knife, swirl the white chocolate and blueberry together. Repeat these steps twice more.

Place the pan in fridge to set for at least three hours. Cut into pieces and eat. Fudge can last for one week in an airtight container.

Cooking the Books | Bouchon Bakery by Thomas Keller

I was looking for a pumpkin scone recipe, and while I didn’t find one of those, I did find Bouchon Bakery. It’s a pretty big book filled with all sorts of bread, muffins, and other carb-filled confections. As with most modern cookbooks, personal anecdotes, pieces of advice, and beautiful photos are interspersed between recipes. The personal anecdotes don’t mean much to me, since I have no idea who these folks are, but I did find a lot of good advice I had never heard before. Who knew you were supposed to lightly beat and strain eggs before mixing them to batter? Without the photos this would definitely feel overwhelming. Even with the photos, this cookbook could keep you busy for a very long time– reading it and baking from it. The authors are in favor of sacrificing convenience for the freshest ingredients and most authentic flavors. This means you better be prepared, as some doughs need to rest before they are baked. You also might need to look in specialty shops for things like fresh vanilla beans or whole nutmegs.

Some advice they gave, however, felt unrealistic or unfeasible for a hobby baker. I personally don’t plan on ordering pre-cut rectangles of parchment paper from restaurant specialty shops or acquiring a bicycle pastry cutter, and I definitely don’t have all (or even most) of the pastry bag tips they suggest. Unfortunately, the too-small font combined with the sheen of the pages and the unwieldy size of the book make this book difficult to read for very long.

Since I didn’t find my pumpkin scone recipe, I went with the next closest thing: pumpkin muffins. I opted to not decorate, frost, or fill mine (sorry, coworkers).

I did make a few changes to this recipe to make it work in my kitchen:

  • I didn’t have a stand mixer with a whisk attachment, so I whisked the batter by hand.

  • I used ground nutmeg instead of fresh grated nutmeg.

  • I used unsweetened applesauce in one batch (instead of eggs) for a vegan friendly version.

  • I also didn’t have a kitchen scale, so I used the cup/spoon measurements provided.

Since I had the home team advantage, I tried one of each (traditional and eggless) as soon as they were cool enough to eat. I could tell that they were dry but had the bready fall flavor I was looking for. Aside from that, I couldn’t tell the difference between the two once they were baked. In dough form, it was visibly obvious that the applesauce batter was more moist. The consensus from my coworkers was that the muffins were dry but had a lot of flavor–the clove flavor especially stood out. Some of their comments include:

  • Good, but not as moist as I would like.

  • Delightfully crusty on top, and crumbly inside. Appreciate that they aren’t greasy like so many muffins.

  • A little dry, very dense, I like the cloves.

  • Good spice flavor, but very dense and somewhat dry. Afterburn with the clove, which is nice.

  • Very tasty, but they are a tad dry. The no-egg version [muffins] are much more moist! Very good!!

A couple of people suggested adding things like chocolate chips or walnuts. Overall, I thought these were pretty tasty and definitely worth the effort.

Recipe

Ingredients

All-purpose flour 200 grams | 1 ¼ cups + 3 tablespoons
Baking soda 2.3 grams | ½ teaspoon
Ground cinnamon 2.2 grams | ¾ + ⅛ teaspoon
Ground cloves 0.6 gram | ¼ teaspoon
Freshly grated nutmeg 0.5 gram | ½ teaspoon
Ground allspice 0.1 gram | pinch
Kosher salt 1 gram | ½ teaspoon
Granulated sugar 222 grams | 1 cup + 2 teaspoons
Canola oil 100 grams | ¼ cup + 3 tablespoons
Pure canned pumpkin puree or fresh pumpkin puree 210 grams| ¾ cup + 2 tablespoons
Eggs 100 grams | ¼ cup + 2 ½ tablespoons
Golden raisins (optional) 80 grams | ½ cup + ½ tablespoon
Cream cheese frosting 286 grams | 1 ¼ cups

You’ll need a 6-cup jumbo muffin pan, muffin papers, a disposable pastry bag, a pastry bag with an Ateco #865 French star tip (optional), and a 1 ⅜ inch round cutter (optional)

Instructions

TO BAKE THE MUFFINS: Preheat the oven to 425 degrees F (standard). Line the muffin pan with muffin papers and spray the papers with nonstick spray.

Transfer the batter to the disposable pastry bag and cut ½ inch of the tip from the bag; or use a large spoon. Pipe or spoon the batter into the papers, stopping ½ inch from the top (140 grams each).

Place the pan in the oven, lower the oven temperature to 325 degrees F, and bake for 45 to 48 minutes, or until the muffins are golden brown and a skewer inserted in the center comes out clean. Set the pan on a cooling rack and cool completely.

TO FILL THE MUFFINS: Using the round cutter, cut through the top of each muffin, stopping ½ inch from the bottom, and carefully remove the center (or use a paring knife to remove the centers).

Transfer the frosting to the pastry bag with the star tip and fill the cavity of each muffin with 35 grams/2 ½ tablespoons of the frosting. Then pipe a rosette in the center of each muffin. Refrigerate uncovered for about 30 minutes to firm.

The muffins are best the day they are completed, but they can be refrigerated in a covered container for up to 3 days. Unfilled muffins can be wrapped individually in a few layers of plastic wrap or stored in a single layer in a covered container at room temperature for up to 3 days or frozen for up to 1 week.  Makes 6 muffins.

Cooking the Books — Yummy: A History of Desserts by Victoria Grace Elliott

Welcome to Cooking the Books, where we try recipes found in, well, books! This month, Children’s Assistant & STEM Specialist Ms. Meghan tried out a recipe from one of her recent favs:

Yummy: A History of Desserts by Victoria Grace Elliott has been on my TBR (To Be Read) list/mountain for over a year now, so I was excited to have a chance to finally get around to it.

This is a nonfiction graphic novel for kids (but readable and enjoyable at any age!) about the history of desserts from around the world. Specifically, it focuses on ice cream, cake, brownies, pie, gummies, and cookies. These tales are introduced to us by Peri, a food sprite, and her sprite friends Fee and Fada. The history of each broad category of delectable dessert is told through a combination of history lessons, story times, science labs, interview corners with famous foodie figures, and recipes! The pages are jam (ha) packed with information and colors, and can at times be a bit difficult to follow. But overall I really enjoyed this book and learned all kinds of fascinating facts, like how in the mid 1800s street vendors used to sell ice cream by the ‘lick’ (exactly as hygienic as it sounds), and the science of how the butter in pastry dough leads to those lovely flaky layers.

I chose to make the Funfetti Cake recipe in cupcake form, as opposed to an 8×8 inch baking pan, since that would be the easiest way to share it with my discerning critics/co-workers. This recipe produces a very wet batter. It was quite messy spooning it into the cupcake liners. I also filled them completely full; this was a change from my usual ‘fill ⅔ full’ method of baking, but hey, I’m following the recipe! Fortunately for my oven, they didn’t overflow during baking like I feared. I did need to add two minutes to the upper range of the baking time listed by the recipe to get them to cook through. Upon removal from the cupcake tray, the paper liners were soaked through with oil.

The cupcakes are incredibly dense and moist. There’s a good flavor, with a hint of tang from the sour cream (which was a new cupcake ingredient for me). If I make these again, I’ll do a frosting from scratch, as I found the canned Pillsbury vanilla to be too sweet for my taste. While my husband and I found this recipe to be a bit too dense and moist, my coworkers disagreed. These traits were mentioned in every review, and almost always positively. ‘Much more flavor than a box mix’, ‘would happily eat again’, and ‘festive and fun for kids!’ were highlights of the reviews. While I found the recipe less than stellar, I really did enjoy the book and look forward to the companion Tasty: A History of Yummy Experiments, which comes out in December.

Cupcakes: 8/10 stars (based on all reviews)

Book: 4/5  stars (based on my own opinion)

The Recipe:

Funfetti Cake

Ingredients:
1 c sugar
½ c butter
¼ c sour cream
2 eggs
2 tsp vanilla extract
1 ½ c flour
2 tsp baking powder
1 c milk
½ tsp salt
½ sprinkles
1 can of your favorite frosting!
(and more sprinkles)

Requirements:
8×8 – inch cake pan or 1 cupcake tin
Mixer with beater attachment
Whisk and spatula
2 large mixing bowls


Instructions:

  1. Make sure the butter, eggs, sour cream, and milk are all room temperature!
  2. And before you start, preheat your oven to 350 F. Prepare your pan! If you’re using the cake pan, grease with butter. If you’re making cupcakes, line the cupcake pan with liners
  3. NEXT, cream the softened butter and sour cream with the sugar! Make sure you beat the mixture until it’s light and fluffy.
  4. THEN, beat in one of the eggs until the mixture is fluffy. Then, beat in the other egg until fluffy! Add them one at a time to keep the batter light!
  5. ONCE MIXED, stir in the vanilla.
  6. IN A DIFFERENT BOWL, whisk together the flour, baking powder, and salt.
  7. FOR THE NEXT STEP, you’ll be taking turns between adding the flour mixture and the milk. Always make sure to mix it in completely before adding more! Add half the flour and mix in with the spatula.
  8. THEN add all the milk and mix.
  9. FINALLY, add the rest of the flour and mix!
  10. NOW’S THE FUN PART! Add the sprinkles! Gently mix until they’re evenly spread, but not for too long.
  11. FINALLY! The batter is ready! Pour into the cake pan and smooth the surface. Or, if you’re making cupcakes, spoon carefully into the liners.
  12. NEXT, bake at 350! The cake will need 30-35 minutes. The cupcakes will need 20-25 minutes. You’ll know it’s done when you stick a toothpick in and it comes out clean!
  13. WHEN IT’S DONE, let it cool COMPLETELY! If you have a cooling rack, use that! If you frost it while it’s still warm, the frosting will melt and get EVERYWHERE!
  14. WHEN IT’S COOLED, DECORATE IT!

Cooking the Books — Kitchens of the Great Midwest by J. Ryan Stradal

 Welcome to Cooking the Books, where we try recipes found in, well, books! This month, Technical Services Supervisor Anne tried out a recipe from one of her recent favs: I first read J. Ryan Stradal’s The Lager Queen of Minnesota this spring and I couldn’t put it down. When it was announced that Stradal was stopping by Galesburg’s Wordsmith Bookshoppe literally days after I finished the novel, I hustled on over. Stradal was polite, unassuming and kindly posed for a photo with me. (I’ll not share the photo as my Saturday-doing-chores look was not my best.) Soon after, I found myself purchasing an autographed copy of his 2015 novel Kitchens of the Great Midwest. The storyline follows the coming of age of Eva, a chef with a select palate, who’s life is woven through a cast of characters, all tied together by food. The book begins with memories of lutefisk, meanders Read more »

Copyright © 2024 Galesburg Public Library. All rights reserved. Web Hosting and Design by InMotion Hosting